|
Welding-inspectionfor soundness and efficiency:SOLUTIONS with Effective, Powerful Advice
In this Site page fundamental Welding-inspection principles and practical information are provided. Non-destructive methods are briefly described:
Furthermore other techniques like leak testing, are mentioned. Useful links and inspection tips on what means to interpret results, and how to obtain answers, are proposed to interested readers. In a previous page on destructive TESTING we discussed the importance of assessing on test specimens the actual performance capability of real welds realized. Here we are going to introduce to some extent the methods of nondestructive Welding-inspection that are specified to determine soundness, quality and efficiency of welded structures. Welding-inspection is generally understood as non destructive. Then, to detect and evaluate superficial discontinuities or internal ones, which cannot be seen by naked eye visual inspection, suitable inspection methods are employed to assure quality production. Detected discontinuities must be evaluated according to criteria based on the importance of the application. On the difference between defects and discontinuities see the page on Indications?... It should be understood that the Welding-inspection methods presented in the following are designed to find indications which have to be interpreted to determine their significance and real importance. Some indications may be irrelevant, and shall be ignored by the inspector. Other may point to discontinuities which have to be evaluated with reference to the imposed limits for acceptance. Upon evaluation, they are either accepted or rejected for further examination, by more experienced professionals, or by additional more sensitive methods. If there is no space for any doubt, the decision to reject the unrepairable welded item may be definitive without appeal. Why is nondestructive Welding-inspection needed? It is part of engineering requirements and it is
An Article on Visual-inspection was published in the section 11 on Contributions in the April 2004 issue of Practical Welding Letter. An Article on Risk Assessment was published In Section 7 in Issue 29 of Practical Welding Letter for January 2006. To read the article click on PWL#029. An Article on Fatigue Monitoring was published in section 11 of the issue 30 of Practical Welding Letter. To see the article click on PWL#030. A special Issue #049B of Practical Welding Letter for Mid September 2007 was dedicated to Resources on Visual Inspection and Requirements, presenting links to relevant information. Click on PWL#049B to see it. An Article on Remaining Life Assessment was published (7) in Issue 56 of Practical Welding Letter for April 2008. Click on PWL#056 to read it. An Article on Risk Based Inspection was published in section 2 of the issue 57 of Practical Welding Letter for May 2008. To see the article click on PWL#057 An Article on Acoustic Emission Inspection of Weldments was published (2) in Issue 62 of Practical Welding Letter for October 2008. A new website page was recently added on Acoustic Emission Inspection.
An Article on Sinter Brazing and Resonant Acoustic Inspection was published (2) in Issue 75 of Practical Welding Letter for November 2009. An Article on Weld Quality Monitoring was published (3) in Issue 137 of Practical Welding Letter for January 2015. An Article on Measuring Depth of Decarburization was published (3) in Issue 139 of Practical Welding Letter for March 2015. An Article on Traceability in Automated Cutting was published (2) in Issue 146 of Practical Welding Letter for October 2015. An Article on Improved Visual Inspection was published (2)
in Issue 148 of Practical Welding Letter for December 2015. An Article on Experience with Virtual Welding Simulators was published (2) in Issue 149 of Practical Welding Letter for January 2016. An Article on A Career as Welding Inspector and another on Welding Log Book were published (7)(11) in Issue 164 of Practical Welding Letter for April 2017.
An Article on Putting Welds to the Test was published (11) in Issue 166 of Practical Welding Letter for June 2017.
To receive the Letter as it is published, please click on Subscription. Click to see the page on Visual Weld Inspection.
Inspectors... Who should perform Welding-inspection? The first one to have a look should be the welder. Welders, immediately after ending their job, should look with critical eye to their work, even if a formal visual inspection is later assigned to an appointed inspector. Visual inspection should be performed with proper auxiliary lighting and some means of low power magnification. Visual Weld Inspection should be taught to all welders. This will help to make them familiar with the essential features to be examined, and aware of the criticism their work will be subject to. Alignment and distortion should be explained to them. The importance of acknowledging an occasional mistake should be stressed. They should be encouraged to reveal such occurrence to their boss, and to ask for advice on the correct way to put it right, instead of covering it up with more damaging welding. Also the use of simple measuring aids should be shown to them, together with the appreciation of weld bead shape and dimensions checking. Other non destructive Welding-inspection methods require special theoretical studies, formal training, serious examinations and accumulation of experience. It is not realistic nor required, to demand expertise in all these methods from the welder's part. Nevertheless learning to communicate with the inspectors on their findings will help his/her understanding of the problems. It will also clarify the need, if any, to improve welders' performance. Internal or hired inspection? If Welding-inspection can be performed by personnel internal to the Organization, that is the best solution. It shortens communication lines, and speeds up reactions. But is that possible? Can a welding shop sustain the cost of instructing inspectors, having them certified and procuring all the necessary equipment and accessories? Depending on purchase order requirements, Welding-inspection may be performed either in house or by external commercial laboratories. The production parts must be approved or sent back for repair, (or rejected). The conclusions must be made available in writing with suitable signed paperwork. External inspectors should be qualified to do inspection and evaluation work, and Certified by an official agency acceptable to the purchaser. An Article on How to become an AWS Certified Welding Inspector was published (11) in Issue 84 of Practical Welding Letter for August 2010. Service van?... Transportation of heavy welded pieces to and from a Welding-inspection facility can be costly. What about hiring an external service at the welding place? Such a facility may have a service van available with all they need. One must insist in having a proof of inspectors Certification by a known agency, and in obtaining signed test reports acceptable by the purchaser. Inspectors should be endowed with integrity, knowledge and experience, with common sense, and should not depend in the line of authority from the production manager. This is a precaution necessary to be make them unbiased in their judgement. In the following, the principles of operation of the major Non Destructive Testing (NDT) methods used for Welding-inspection, shall be introduced as a matter of orientation for the interested reader. X-Rays... RADIOGRAPHIC Welding-inspection is performed by pointing a radiation source (an x-ray tube or a radioactive isotope) to the portion of the weldment to be inspected. A radiographic film or a Digital Detector Array, placed on the underside (or the other side away from the source) is exposed for a certain time to the radiation. The radiograph is the visible image to be viewed and evaluated by the certified inspector. It contains information on the internal features of the weld, much as a medical radiograph that is used to check the human body. In the past it was made available on an exposed, developed and fixed industrial film. Modern system, applying digital industrial radiography, use a sensitive device, similar to the sensors used in electronic photography. They reproduce on a computer screen, an image, similar to that provided by an exposed, developed and fixed film. Electronic manipulation of the recorded information allows several advantages, relative to the obsolete film based methods:
The use of digital technology permits immediate establishment and improvement of parameters for optimizing results. Due to the harmful nature of ionizing radiation (like x-rays or gamma rays) it is most important that the manipulation of ionizing sources be entrusted to trained and knowledgeable inspectors that will not endanger themselves or passers by. The next step on which researchers are working is to develop acceptable methods of digital image processing, for automatic analyzing and feature extraction of indications, culminating in automatic defect evaluation through tools of pattern recognition. Interpretation... The radiographic Welding-inspection interpretation of the subtle cues appearing in the radiograph, requires understanding the basics of the process. It needs learning the variables and their influence, to generate a meaningful image. Experience will teach inspectors to recognize the possible expression on the screen of internal features present in the weldment. In general the image registers local differences of absorption of radiation by the material, as a function of density and of thickness. Very thin discontinuities parallel to the surface may go undetected. The normal radiograph is a flat reproduction of the sums of projections of all the features present along the thickness of the welded structure. No indication of the position along the line of radiation is available. Special (tomographic) techniques must be put in place if it is important to know at which depth the feature is located. General information and specific recommended practices can be found in:
Acceptance... Acceptance criteria for Welding-inspection are established by the designer with reference to standard images, called Reference Radiographs. These are identified in accepted Specifications by letters and numbers according to base material classes and to thicknesses and issued by ASTM and by other organizations.
The appearance of a radiograph is compared visually by the inspector with the limiting Reference Radiograph established by the designer in the instructions for Welding-inspection. If it appears equal to or better than the reference radiograph then it is accepted, otherwise it is rejected. In this case somebody with relevant knowledge and experience has to decide if the weldment can be repaired and how. In the end, after repair welding a new radiograph has to be taken. An Article on Microfocus Radiography was published (11) in Issue 101 of Practical Welding Letter for January 2012.
NEW RESOURCES
Looking for more Online Reference Links?
A new page on Resources on Welding Inspection was announced (8) in Issue 143 of Practical Welding Letter for July 2015.
Hear here... ULTRASONIC Welding-inspection is based on the fact that acoustic waves of a frequency not heard by the human ear can propagate in materials, and be reflected in various ways by internal interfaces and by distant surfaces. The acoustic waves are generated by piezoelectric transducers which transform electrical vibrations (from an electronic frequency generator) into mechanical vibrations of a crystal, that are transmitted to the inspected body through a coupling medium. The same instruments collect the reflected back acoustic waves and transform them in electric signals that are shown as visible traces on a screen. The traces of the signals of those reflections (echoes) are displayed in modern instruments on a computer screen. First suitable parameters for operating the instrument, must be selected by the inspector, or retrieved from a stored program. Then calibration is performed by making reference to standard reflectors (normally flat bottom holes carefully machined on specimens of the same material) of given shape and size. Then the ultrasonic inspector scans the body to be examined , either by manual manipulation of the transducer on the part, or by operating an automatic scanner, and observes the scanning traces. The experienced inspector examines the display, in search of possible echos generated in the volume of the inspected body by fortuitous reflective surfaces like defects. If an echo is present where it should not be and if its trace is larger than that of comparison, then there is an indication of discontinuity that must be evaluated. Depending on the outcome of the evaluation, which may make use of additional techniques, the result of the inspection is decided, either to accept or to reject. It should be emphasized that ultrasonic testing is capable of detecting thin interfaces normal to the line of propagation of the wave (that X-Rays cannot detect) so that both testing methods complement each other. Reference blocks... Accepted Reference Standard Blocks specially designed to be used for Welding-inspection by Ultrasonic Testing of weldments were established by the International Institute of Welding (IIW). They are called IIW Type 1 and IIW Type 2 and can be found in:
Standard Reference Blocks are found with dimensions in inches or in mm: they are similar but not equivalent. See also:
However, specialized probes and setups can be developed for unique items, where the decision is reached using a "go/no-go" approach. This kind of instruments makes no assumptions on the operator, who need not have any previous experience in ultrasonics. Such instruments, which are individually adapted and not universal, free the operator from all responsibility, once the setup and calibration procedure are established and implemented as directed by the manufacturer. The rejects have to be evaluated again later by a more knowledgeable and experienced inspector. An Article on Automated Ultrasonic Testing was published in the Issue 23 of Practical Welding Letter for July 2005. Click on PWL#023 to read it. An Article on UT TOFD (Ultrasonic Testing Time-of-Flight Diffraction), was published in section 7 of Issue 35 of Practical Welding Letter for July 2006. To read the article click on PWL#035. An Article on Phased Arrays of Ultrasonic Transducers was published in issue 45 of Practical Welding Letter for May 2007. For reading the article click on PWL#045. An Article on Acoustic Micro Imaging was published (11) in Issue 80 of Practical Welding Letter for April 2010. An Article on Nondestructive Acoustic Cross-Sectioning was published (7) in Issue 135 of Practical Welding Letter for November 2014. An Article on Acoustic Imaging for process quality control was published (3) in Issue 143 of Practical Welding Letter for July 2015.
To receive the Letter as it is published, please click on Subscription.
MPI?... MAGNETIC PARTICLES Welding-inspection is a most useful method applicable to magnetic materials only. It is based on the fact that any discontinuity present in the metal will generate a disturbance, like an interruption or distortion, in a magnetic field flux. Such a disturbance can attract and display a pattern of finely divided magnetic particles that will assemble on those distorted flux lines. The particles are made visible by some appropriate contrasting technique. The inspector has to interpret the indications formed by the particles and visually detected on the surface in order to sort out unacceptable defects, which may be present even at a certain depth. Various pieces of Welding-inspection equipment can generate and concentrate adequate magnetic fields of the proper direction and intensity on the welded part, to permit the detection of the defects sought for. The inspector knows that if the magnetic field is at ninety degrees from the direction of the discontinuity, then the chances of finding it are improved. The magnetic particles, either in a dry powder form or in a liquid suspension are applied on the part after magnetization. The surface is then scanned visually by the inspector to find suspicious concentrations of particles. Standard and Recommendations Documents are:
Penetrant... PENETRANT Welding-inspection is based on the fact that specially formulated liquids have the property of penetrating in tiny cracks or discontinuities open to the surface. The part is further washed of all excessive liquid on its surface and a type of absorbing material (called developer) is spread on it. The remaining liquid absorbed in the cracks, includes a visible dye. As it seeps outside and spreads on the surface of the developer, it makes itself visible to inspection. This type of inspection is used for all non magnetic materials like aluminum, magnesium, titanium, copper etc. and is most apt to detect finest cracks. For improved sensitivity, the penetrant liquid may contain a suspension of fluorescent particles which are visible under ultra-violet light (black light): this method is then called Fluorescent Penetrant Inspection (FPI). Reference Documents are:
An Article on Validation was published (2) in Issue 54 of Practical Welding Letter for February 2008. It deals with new requirements intended to assure that all the conditions for serious and complete Nondestructive Testing are applied for equipment, methods, procedures and inspectors. Click on PWL#054 to read it. To receive the Letter at no cost as it is published, please Subscribe. For fluid containers... LEAK TEST for Welding-inspection is done on all containers built to hold a liquid or a gas: many forms of tests are possible. One popular version consists in generating low air pressure within the container, and looking for bubbles when the container is immersed in water. This is similar to the normal leak test of tire inner tubes. For further information you may wish to explore our page on Leak Testing.
Any questions or comments or feedback? Write them down and send them to us by e-mail.
Click on the Contact Us button in the NavBar at top left of every page.
Did you already hear of our offer? OK, OK.
To reach a Guide to the collection of the most important Articles from Past Issues of Practical Welding Letter, click on Welding Topics.
Welding Standards
If you did not yet find what you need, why not typing your question in the following Search Box?
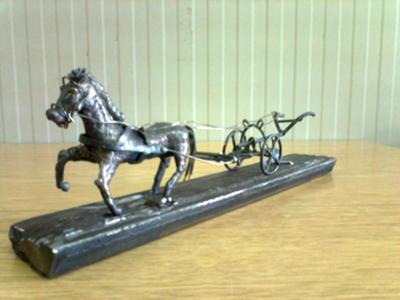
Plow Horse

POWERED BY: Click on this Logo NOW! Watch - The Video: and also
Copyright (c) 2003-2008, 2009, 2010, 2011, 2012, 2013, 2014, 2015, 2016, 2017  Welding-inspection is the last step to make sure that only quality products leave the manufacturing line. All you need to know...
|


